


오늘 배운 것은 리액트처럼 생각해서 컴포넌트를 잘 구성하기! 댓글 추가하는 것을 예제로 배웠다. 구성과 문법에 집중해서 해보기 !!

1. 위의 파일트리처럼 파일 생성 / 코드 작성 / 연결
commentLayout은 <ul> commentForm, List<li>, commentItem <ul>, <li> 사용
css는 기존에 했던 파일 사용
App.jsx
import React, {Component} from 'react'
// import Comment from './component/comment/Comment'
import Comment from './self_study/component/Comment'

class App extends Component{
    render(){
        return(
            <>
                <Comment/>
            </>
        )
    }
}

export default App
Comment.jsx
import React from 'react'
import CommentLayout from './CommentLayout'
import CommentForm from './CommentForm'
import CommentList from './CommentList'

const Comment = () => {
    return (
        <>

            <CommentLayout>   {/* 요렇게 감싸주려면 children을 CommentLayout 컴포에서 선언해주기 */}
                <CommentForm />
                <CommentList />
            </CommentLayout>

        </>
    )
}

export default Comment
CommentLayout.jsx
import React from 'react'

const CommentLayout =({children})=>{
    return(
        <>
            <ul>
                {children}
            </ul>
        </>
    )
}

export default CommentLayout
CommentForm.jsx
import React from 'react'

const CommentForm = () => {
    return (
        <>
            <li className="comment-form">
                commentForm Component
                <form>
                    <span className="ps_box">
                        <input type="text" className="int" />
                    </span>
                    <button type="submit" className="btn">댓글 추가</button>
                </form>
            </li>
        </>
    )
}

export default CommentForm
CommentList.jsx
import React from 'react'
import CommentItem from './CommentItem'

const CommentList =()=>{
    return(
        <>
            <li>
                <CommentItem/>
                <CommentItem/>
                <CommentItem/>
            </li>
        </>
    )
}

export default CommentList
CommentItem.jsx
import React from 'react'

const CommentItem =()=>{
    return(
        <>
            <ul className="comment-row">
                <li className="comment-id">아이디</li>
                <li className="comment-content">댓글1</li>
                <li className="comment-date">2021-07-14</li>
            </ul>
        </>
    )
}

export default CommentItem
2. context, reducer 만들기 / 코드 작성

comment> store 폴더 > context.jsx, reducer.jsx
context는 상태값 저장소 -> 데이터 관리소
컴포넌트에 데이터 저장하기보다 context를 활용하기
컴포넌트는 효율적인 화면 구성, 예쁘게 나타내기에 최적화
두 역할을 잘 분리하기!
context.jsx
import React from 'react'

const initialState={
    commentItem:[
        {userid:'아이디입니다', content:'댓글', date:'2021-07-14'}
    ]
}

const Context = React.createContext(initialState) // context 생성
// createContext() 의 인자값은 저장하는 기본 값

export default Context
Context 라는 변수에 저장소 context를 생성, 기본값은 initialState 에 담은 객체를 줌 그리고 export
reducer.jsx 기본 틀 작성
const reducer = (state, action) => {
    switch (action.type) {
        case 'CREATE':
            return {
                ...state,
            }
        case 'UPDATE':
            return {
                ...state,
            }
        case 'DELETE':
            return {
                ...state,
            }
        default:
            return {
                ...state,
            }
    }
}

export default reducer
dispatch 실행되면 reducer 가 실행되어지고 action 인자값 안에 받은 type 명으로 각각의 return
댓글 추가, 수정, 삭제 순으로 작성
여기서 ...state가 아닌 그냥 state를 쓰면 XX
불변의 법칙때문에 얕은복사를 해와서 값을 변경시킬 수 있어야함
3. CommentLayout에서 context, reducer 가져오기 / context 사용하기 / 아위 컴포넌트들에게 전달
CommentLayout.jsx
import React, {useContext , useReducer} from 'react'
import Context from './store/context'
import reducer from './store/reducer'

const CommentLayout = ({ children }) => {

    const globalStore = useContext(Context)
    const [state, dispatch] = useReducer(reducer, globalStore)

    return (
        <>
            <Context.Provider value={{state,dispatch}}>
                <ul>
                    {children}
                </ul>
            </Context.Provider>
        </>
    )
}

export default CommentLayout
CommentLayout이 return 하는 children -> CommentForm, CommentList, CommentItem 에게 value 값을 뿌려줄 때 객체로 {state:state, dispatch:dispatch}로 보내주기 때문에 { { } } 두 번씩 쓰는거 ** {}-> js, {} -> 객체 표현
4. Comment form context 가져오기 , 사용하기 + input box 입력값 onChange event, submit하면 변경되도록 만들기
상위 컴포넌트에서 value로 값을 보내주었어도 Context.jsx 를 가져와야함 !
CommentForm.jsx
import React, {useContext , useState} from 'react'
import Context from './store/context'

const CommentForm = () => {
    const [input, setInput] = useState('')
    const {state,dispatch} = useContext(Context)

    handleChange=(e)=>{
        setInput(e.target.value)
    }

    handleSubmit=(e)=>{
        e.preventDefault()
        dispatch({type:'CREATE', payload:{userid:'아이디', content:input, date:'2021-07-14'}})
        setInput('')
    }

    return (
        <>
            <li className="comment-form">
                commentForm Component
                <form onSubmit={handleSubmit}>
                    <span className="ps_box">
                        <input type="text" className="int" placeholder="입력해주세요" value={input} onChange={handleChange}/>
                    </span>
                    <button type="submit" className="btn">댓글 추가</button>
                </form>
            </li>
        </>
    )
}

export default CommentForm
5. dispatch로 보낸 값 reducer 함수에서 받기
reducer.jsx
const reducer = (state, action) => {
    switch (action.type) {
        case 'CREATE':
            return {
                ...state,
                commentItem:[...state.commentItem, action.payload]
            }
        case 'UPDATE':
            return {
                ...state,
6. CommentList.jsx에서 Context 저장소에서 state만 가져와 CommentItem에게 뿌리기
CommentList.jsx
import React, { userContext, useState } from 'react'
import CommentItem from './CommentItem'
import Context from './store/context'

const CommentList = () => {

    const { state } = useContext(Context)
    const list = state.commentItem
    const Item = list.map((v, k) => {
        return (
            <>
                <li>
                    <CommentItem  key={k} userid={v.userid} content={v.content} date={v.data}/>
                </li>
            </>
        )
    })

    return (
        <>
            <li>
                {Item}
            </li>
        </>
    )

}

export default CommentList
7. CommentItem.jsx에서 CommentList.jsx 가 보내준 값들을 사용하기
CommentItem.jsx
import React from 'react'


const CommentItem =({key, userid, content, date})=>{
    return(
        <>
            <ul className="comment-row" key={key}>
                <li className="comment-id">{userid}</li>
                <li className="comment-content">{content}</li>
                <li className="comment-date">{date}</li>
            </ul>
        </>
    )
}

export default CommentItem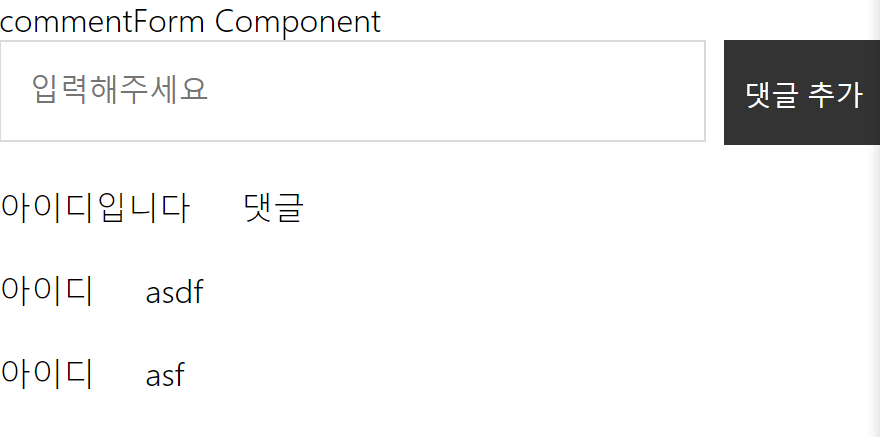
-> 댓글창에 댓글 추가 가능!
'블록체인 기반 핀테크 및 응용 SW개발자 양성과정 일기' 카테고리의 다른 글
| [88일차 복습] 리액트 댓글 수정 삭제 (0) | 2021.07.15 |
|---|---|
| [88일차]20210715 리액트 댓글 수정 삭제 (0) | 2021.07.15 |
| [87일차]20210714 Context로 댓글 만들기 (with 리액트식으로 컴포넌트 구성하기) (0) | 2021.07.14 |
| [86일차 복습] React useReducer Context syled-component로 TicTacToe만들기 (0) | 2021.07.14 |
| [86일차]20210713 리액트 useReducer Context styled-component Ref Css TicTacToe 만들기 (0) | 2021.07.13 |


