

로그인 구현을 위해 알아야할 개념
Session Cookie
Oauth - http 보안 프로토콜 / server, client 간의 key 를 가지고 연결
Authentication 인증
Authorization 허가
1. 카카오Developers 접속 -> 로그인 -> 내 어플리케이션 -> 추가 (to get REST API )


REST API 키만 사용할거야 !
2. Visual Studio 새 폴더 -> server.js 파일 생성 -> 위의 REST API 키 주석으로 적어놓기

3. kakao Developers 로그인 -> 활성화 설정 상태 on -> Refirect URI
http://localhost:8000/auth/kakao/callback 으로 설정
rest API를 개발하는 경우 필수 설정
(카카오 로그인 되었을 때 url 나올 곳 적기 )
-> server.js 주석으로 달기

4. secret key 만들기 -> 보안 -> 코드생성 - >key 생성
P7GAyuIufPnwOFUAPkQ99O9Db8xepm4v
-> server.js 에 주석으로 달기 -> 카카오에게 이 키를 보내서 우리가 허락받는 암호 (요청 시 이거 담아서 보내기)
====================================셋 팅=====================================
0. npm init
1. express 다운, 코드 작성
터미널 express 다운 : npm install express
server.js 코드 작성
//Authentication 인증
//Authorization 허가
// REST API : f5a600f54f327fe75f720881572afb77
// Redirect : http://localhost:8000/auth/kakao/callback
// Key : P7GAyuIufPnwOFUAPkQ99O9Db8xepm4v


const express = require('express');
const app = express();

app.get('/', (req,res)=>{
    res.send('kakao login');
})

app.listen(3000,()=>{
    console.log(`server start port : 3000`)
})

1-1. node server.js 적고 서버 잘 뜨는지 확인 !
일단 server.js 에 한 곳에 모아서 만들 예정 (나중에 보고 작업하기 쉽게)
2. nunjucks 설치, 코드작성, views 폴더 생성, index.html views폴더 안 생성
터미널 명령 실행
$npm install nunjucks
nunjucks 코드 작성
views 폴더 생성
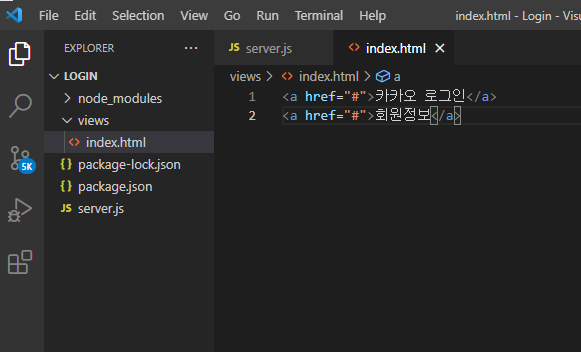
index.html 생성&코드 추가
<a href="#">카카오 로그인</a>
<a href="#">회원정보</a>
html 연결
//Authentication 인증
//Authorization 허가
// REST API : f5a600f54f327fe75f720881572afb77
// Redirect URI : http://localhost:8000/auth/kakao/callback
// Key : P7GAyuIufPnwOFUAPkQ99O9Db8xepm4v


const express = require('express');
const app = express();
const nunjucks = require('nunjucks');

nunjucks.configure('views', {
    express:app,
})
app.set('view engine', 'html')

app.get('/', (req,res)=>{
    res.render('index.html');
})

app.listen(3000,()=>{
    console.log(`server start port : 3000`)
})
3. 카카오 객체에 내용 담기
갖다 쓰기 편하게 그냥 담아 놓은 것
server.js 에 아래 내용 적기
const kakao={
    clientID : 'f5a600f54f327fe75f720881572afb77',
    clientSecret : 'P7GAyuIufPnwOFUAPkQ99O9Db8xepm4v',
    redirectUri: 'http://localhost:8000/auth/kakao/callback'
}
개념 설명 추가 **
1. [카카오로그인] 클릭하면 -> 카카오page가 뜸
2. [카카오로그인] 클릭하면 -> ID, PW 담는 popup -> 카카오 page
*ID, PW 을 담는 url은 kakao의 것 !
로그인 입력하는 폼이 모두 kakao, 우리는 id, pw를 받을 쑤가 없다.
--> 우리가 던져줘야하는 건 kakao 의 url 이다 !

4. kakao login page로 넘어가게 clientID, Redirect uri값, res type 함께 get으로 보내기
일단 우리 페이지 /auth/kakao에 한번 거치게 만들거야
views-index.html url 수정
<a href="/auth/kakao">카카오 로그인</a>
<a href="#">회원정보</a>
server.js 아래 코드 작성
app.get('/auth/kakao',(req,res)=>{
    const kakaoAuthURL = `https://kauth.kakao.com/oauth/authorize`;
    res.redirect(kakaoAuthURL);
});
이것만 쓰면 안되고 우리의 정보 key 값을 get 값으로 보내야함
app.get('/auth/kakao',(req,res)=>{
    const kakaoAuthURL =
    `https://kauth.kakao.com/oauth/authorize?
    client_id=${kakao.clientID}
    &redirect_uri=${kakao.redirectUri}
    &response_type=code`;
    res.redirect(kakaoAuthURL);
});
server.js 전ㅊㅔ
//Authentication 인증
//Authorization 허가
// REST API : f5a600f54f327fe75f720881572afb77
// Redirect URI : http://localhost:8000/auth/kakao/callback
// Key : P7GAyuIufPnwOFUAPkQ99O9Db8xepm4v


const express = require('express');
const app = express();
const nunjucks = require('nunjucks');

nunjucks.configure('views', {
    express:app,
})
app.set('view engine', 'html')

const kakao={
    clientID : 'f5a600f54f327fe75f720881572afb77',
    clientSecret : 'P7GAyuIufPnwOFUAPkQ99O9Db8xepm4v',
    redirectUri: 'http://localhost:8000/auth/kakao/callback'
}

app.get('/', (req,res)=>{
    res.render('index.html');
})

app.get('/auth/kakao',(req,res)=>{
    const kakaoAuthURL = `https://kauth.kakao.com/oauth/authorize?client_id=${kakao.clientID}&redirect_uri=${kakao.redirectUri}&response_type=code`;
    res.redirect(kakaoAuthURL);
});

app.listen(3000,()=>{
    console.log(`server start port : 3000`)
})
server on -> 브라우저 가서 check!
https://localhost:3000/ -> 카카오 로그인 -> 카카오의 페이지로 뜸 ! 신기하군

5. 카카오 developers
메뉴 플랫폼 - web 등록
내가 설정한 port 값
지금 설정안하면 ㄴ ㅏ~ 중에 문제 생김 (아까 미리 해도 됨)

지금까지 우리가 만든건 로그인 클릭 -> 카카오 로그인으로 요청 가는거 !
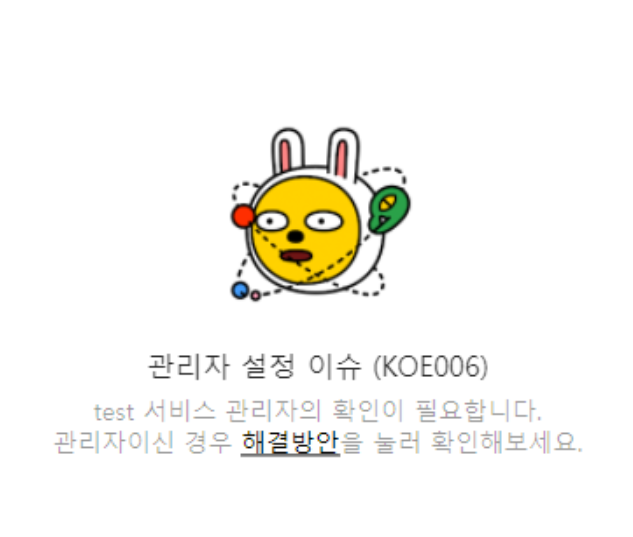
[동의하고 계속하기] 버튼 누르면 에러가 남.
(교수님이 에러 인지하라고 일부러 넣음)
정답 : localhost:8000으로 가있어서 에러야 ! 나는 3000 -> 수정하기
6. server.js port number 수정
const kakao={
    clientID : 'f5a600f54f327fe75f720881572afb77',
    clientSecret : 'P7GAyuIufPnwOFUAPkQ99O9Db8xepm4v',
    redirectUri: 'http://localhost:3000/auth/kakao/callback' // 8000-> 3000수정
}
수정하고 server on -> 다시 실행해봐

아까 카카오 로그인에서 redirect URI 을 8000이라고 되어 있어서
이제 카카오 developers redirect URI 우리거와 맞게끔 수정

정확한 uri 정보를 줘야한다는 교훈 , , Oauth 기준
key값이든 뭐든 하나라도 틀리면 안된다.
다시 server on
->

정 상
아직 안맍들엇음
=========================================================================
개념 보충 2

lcal -> kakao -> local 로 돌아오는 것 까지 했는데 이제 끝 이 아니고
다시 local ----req ---> kakao server 다시 물어보기 kakao 한테 한번더 요청하는걸 지금부터 해볼것임
내 사이트의 보안취약하다면 보안이 문제가 있을 수 있음
내 사이트를 통해 카카오를 해킹할 수 잇음,,
그래서 kakao가 다시 우리한테 req
7. /auth/kakao/callback get 추가
server.js 추가 ! (/auth/kakao 밑에)
app.get('/auth/kakao/callback',(req,res)=>{
    res.send('ok');
})
우리는 저 redirectUri 의 주소안에서만 kakao랑 연락해야함.
server 에서 이제 요청주는 걸 배울 것이ㅑㅇ
axios 라이브러리를 사용해서...
front에서 했던걸 server에서도 쓰기~
9. AXIOS
- 터미널 명령 (axios 다운)
$npm install axios
- server.js 추가 axios 가져오기
const axios = require('axios')
- 결과치 떨어지는거 test해보기
axios 리턴값 = Promise Object
async await 안쓸꺼면.then을 달고
쓸꺼면 써줘 쓰자
카카오한테는 post로 내용 보내주야함
let token;
try {
    token = await axios({
        method: 'POST',
        url: 'https://kauth.kakao.com/oauth/token',
        headers: {
            'content-type': 'application/x-www-form-urlencoded'
        }
    })
} catch (err) {
    res.json(err.data)
}
server on -> console.log 출력 확인
저 url 따로 브라우저에 쳐봐-error 쳌

이번엔 잘 만들어서 던지자
10. 새로운 package 다운 & 코드 작성
$npm install qs
server.js 코드 추가
const qs = require('qs')
let token;
try {
    token = await axios({
        method: 'POST',
        url: 'https://kauth.kakao.com/oauth/token',
        headers: {
            'content-type': 'application/x-www-form-urlencoded'
        },
        data: qs.stringify({
            grant_type:'authorization_code',
            // 특정 string 넣기
            client_id:kakao.clientID,
            client_secret:kakao.clientSecret,
            redirectUri:kakao.redirectUri,
            code:req.query.code,
            //auth/kakao/callback일때 get값으로 준 코드야
        })
        //객체를 string으로 변환
    })
} catch (err) {
    res.json(err.data)
}
바로 success뜨는 이유 : ㅇ
카카오 db에 내 내용이 올라가게 됨.
카카오 id에서 내 내용을 지워주는 걸 해ㅑㅇ함 + 쿠키삭제
카카오 로그인 연결 해제 해놓으면 아까 진행한것처럼 된댕
https://bottlecok.tistory.com/128
카톡으로 가입한 연결된 앱,게임 연결끊는 방법
카톡으로 가입한 연결된 앱,게임 연결끊는 방법 안녕하세요. 언제나 유익한 포스팅으로 찾아뵙길 노력하는 잡캐에요. 오늘은 카톡과 연결된 앱을 간편하게 끊는 방법에 대해 알려드리려고 해요
bottlecok.tistory.com

전체 코드
server.js
//Authentication 인증
//Authorization 허가
// REST API : f5a600f54f327fe75f720881572afb77
// Redirect URI : http://localhost:8000/auth/kakao/callback
// Key : P7GAyuIufPnwOFUAPkQ99O9Db8xepm4v


const express = require('express');
const app = express();
const nunjucks = require('nunjucks');
const axios = require('axios')
const qs = require('qs')

nunjucks.configure('views', {
    express: app,
})
app.set('view engine', 'html')

const kakao = {
    clientID: 'f5a600f54f327fe75f720881572afb77',
    clientSecret: 'P7GAyuIufPnwOFUAPkQ99O9Db8xepm4v',
    redirectUri: 'http://localhost:3000/auth/kakao/callback'
}

app.get('/', (req, res) => {
    res.render('index.html');
})

app.get('/auth/kakao', (req, res) => {
    const kakaoAuthURL = `https://kauth.kakao.com/oauth/authorize?client_id=${kakao.clientID}&redirect_uri=${kakao.redirectUri}&response_type=code`;
    res.redirect(kakaoAuthURL);
});

// app.get('/auth/kakao/callback',async (req,res)=>{
//     token = await axios({
//         method:'POST',
//         url:'https://kauth.kakao.com/oauth/token',
//         headers:{
//             "content-type":'application/x-www-form-urlencoded',
//         }
//     })
//     console.log(token)
//     res.send('ok');
// })
app.get('/auth/kakao/callback', async (req, res) => {
    let token;
    try {
        token = await axios({
            method: 'POST',
            url: 'https://kauth.kakao.com/oauth/token',
            headers: {
                'content-type': 'application/x-www-form-urlencoded'
            },
            data: qs.stringify({
                grant_type: 'authorization_code',
                // 특정 string 넣기
                client_id: kakao.clientID,
                client_secret: kakao.clientSecret,
                redirectUri: kakao.redirectUri,
                code: req.query.code,
                //auth/kakao/callback일때 get값으로 준 코드야
            })
            //객체를 string으로 변환
        })
    } catch (err) {
        res.json(err.data)
    }
    console.log(token);
    res.send('success');
});


app.listen(3000, () => {
    console.log(`server start port : 3000`)
})
views-index.html
<a href="/auth/kakao">카카오 로그인</a>
<a href="#">회원정보</a>
파일 & packages 상태

11. kakao developer
로그인 - 동의항목 - 2개 가져오기 !
저 ID
profile, account_email 이름이 중요

12. server.js 추가
위의 id 들 추가, get값은 1개만 되지만 kakao가 알아서 , 기준 배열로 짤라서 쓸꺼야
app.get('/auth/kakao', (req, res) => {
    const kakaoAuthURL =
    `https://kauth.kakao.com/oauth/authorize?
    client_id=${kakao.clientID}&redirect_uri=${kakao.redirectUri}
    &response_type=code&scope=profile,account_email`;
    res.redirect(kakaoAuthURL);
});
server.on -> 다시 해보기 !
아까 필수는 필수로 쳌해야하고, 선택정보는 선택안해도됨

-> 동의하기 -> success
개념설명 3
요청값을 가지고 db 입력하는 것까지 한거 > 이제
access 토큰을 가지고 또 한번 요청 (회원의 정보를 가져오기) -> 그 이후에는 db, session 저장만 하면 로그인 기능 완료

13. kakao에서 회원 정보 가져오기 (그림 맨 오른쬭)
server.js
app.get('/auth/kakao/callback', async (req, res) => {
    let token;
    try {
        token = await axios({
            method: 'POST',
            url: 'https://kauth.kakao.com/oauth/token',
            headers: {
                'content-type': 'application/x-www-form-urlencoded'
            },
            data: qs.stringify({
                grant_type: 'authorization_code',
                // 특정 string 넣기
                client_id: kakao.clientID,
                client_secret: kakao.clientSecret,
                redirectUri: kakao.redirectUri,
                code: req.query.code,
                //auth/kakao/callback일때 get값으로 준 코드야
            })
            //객체를 string으로 변환
        })
    } catch (err) {
        res.json(err.data)
    }


	//kakao에게 요청 /
    let user;
    try{
        user = await axios({
            method:"GET",
            url:'https://kapi.kakao.com/v2/user/me',
            headers:{
                Authorization:`Bearer ${token.data.access_token}`
            }
        })
    }catch(err){
        res.json(err.data)
    }
    console.log(user);
    res.send('success');
});
console.log(user) 찍고 한번 잘 봐봐,,
만약 여기서 콘솔로그가 vs에 안찍히면 인터넷 쿠키 삭제 & 카카도 계정 연결 끊고 해보기
  data: {
    id: 1739930102,
    connected_at: '2021-05-21T02:27:37Z',
    properties: {
      nickname: '안뇽?',
      profile_image: 'http://k.kakaocdn.net/dn/kqi/btq85gK9hw/ecW5iwL9kUFf6JmBGK1VK/img_640x640.jpg',
      thumbnail_image: 'http://k.kakaocdn.net/dn/kqi/tq085gK9hw/ecW5iwL9kUFf6JmBG1VLK/img_110x110.jpg'
    },
이런식으로 나옴
14. 가져온 data를 session에 담고 내용을 가지고 우리 server에 적용하기
이제 local pc 에 session storage에 내용 저장하기
우리가 필요한 내용 - 토큰과 유저
우리는 유저만 넣을게 (토큰도 넣어보는건 온제,,?-> 월욜에)
Session 다운, 설정
$npm install express-session
const session = require('express-session');

app.use(session({
    secret:'aa',//아무내용
    resave:true,
    secure:false,
    saveUninitialized:false,
}))
console.log(user)에 data라는 내용에 우리가 필요한게 있다.
session에 넣어주자
    }catch(err){
        res.json(err.data)
    }
    console.log(user);

    req.session.kakao = user.data

    res.send('success');
});
두개 중 하나 선택 ! --수정--> 1번으로 쓰기
    req.session.kakao = user.data    /// 1번

    req.session = {
        ['kakao'] : user.data,         //// 2번
    }
views-index.html 수정
<a href="/auth/kakao">카카오 로그인</a>
<a href="/auth/info">회원정보</a>
server.js /auth/info 추가
app.get('/auth/info',(req,res)=>{
    console.log(req.session);
    res.render('info.html');
})
console.log(req.session)
으로 session이 잘 저장되었는지 확인
server on -> kakao login 누르고 -> console.log확인
views- info.html 생성, 아무거나 쓰기
('/kakao/auth/callback') 부분 마지막 수정 -> 그럼 kakao 로그인 클릭했을 때 그대로 !
res.redirect('/');
session안에 kakao라는 객체 안에 properties를 사용하면 됨
server.js
app.get('/auth/info',(req,res)=>{
    let {nickname,profile_image} = req.session.kakao.properties
    res.render('info.html',{
        nickname,profile_image
    });
})
info.html
{{nickname}}
{{profile_image}}
server on again -> login -> info check !
login을 눌러야 session 이 생김샘킴
사진 주소로 나오니깐
info.html을
{{nickname}}
<img src="{{profile_image}}">"
요렇게 바꾸면 끝
오늘 내용 중요한 점 :
app.get('/auth/kakao/callback') 요청한 Client는 카카오page를 보고 있을 떄
우리 local server는 ----kakao 에게 총 두번비동기 요청을 한다.
url 요청
url 요청자의 정보

주 말 ㅇ ㅣ ㄷ ㅏ ~~~~~~~~~~~~~~~~~~~~~~~~~~~~~~
====================================== 끗 ====================================
숙제 : passport 사용하는거 따라해보기 (오늘한건 쌩 코드!)
passport 라이브러리 이용해서 해보기 ~
라이브러리는 optional
'블록체인 기반 핀테크 및 응용 SW개발자 양성과정 일기' 카테고리의 다른 글
| [49일차] 20210524 javaScript 카카오 oauth 로그인 kakao login (1) | 2021.05.25 |
|---|---|
| [48일차 복습] JavaScript, node.js, Oauth 로 카카오 로그인 연결해보기 kakao login (0) | 2021.05.24 |
| [47일차]20210520 팀프로젝트 리뷰 / oAuth 2.0 Passport 찍먹 / 내일 다시 정확하게 배우기로 함. (0) | 2021.05.21 |
| [45일차] 20210517 팀프로젝트 css (0) | 2021.05.18 |
| 20210515 팀프로젝트 주말 계획! (0) | 2021.05.15 |


